Products
Solutions
Resources
9977 N 90th Street, Suite 250 Scottsdale, AZ 85258 | 1-800-637-7496
© 2024 InEight, Inc. All Rights Reserved | Privacy Statement | Terms of Service | Cookie Policy | Do not sell/share my information

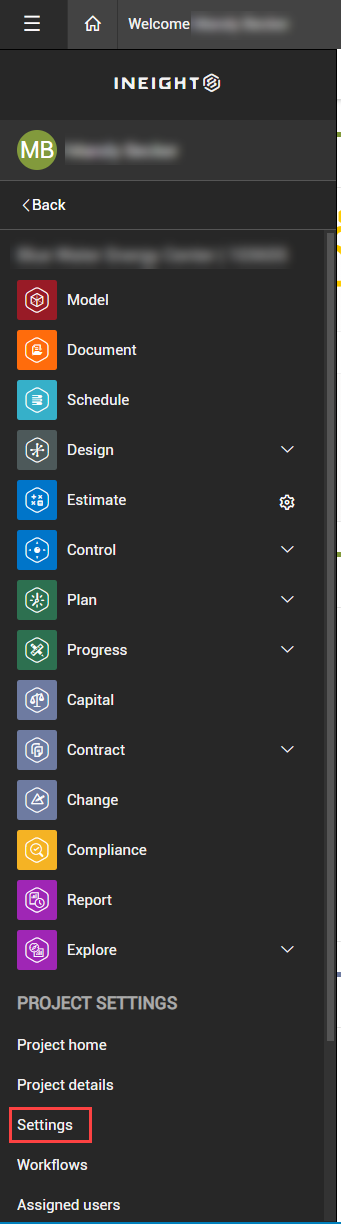
Prior to initiation, it is important to check the project settings to successfully manage a project within Change. Project settings are distinct from organization settings, which are defined by the administrative level of your organization. The image below shows how to get to the project settings from the Main menu.
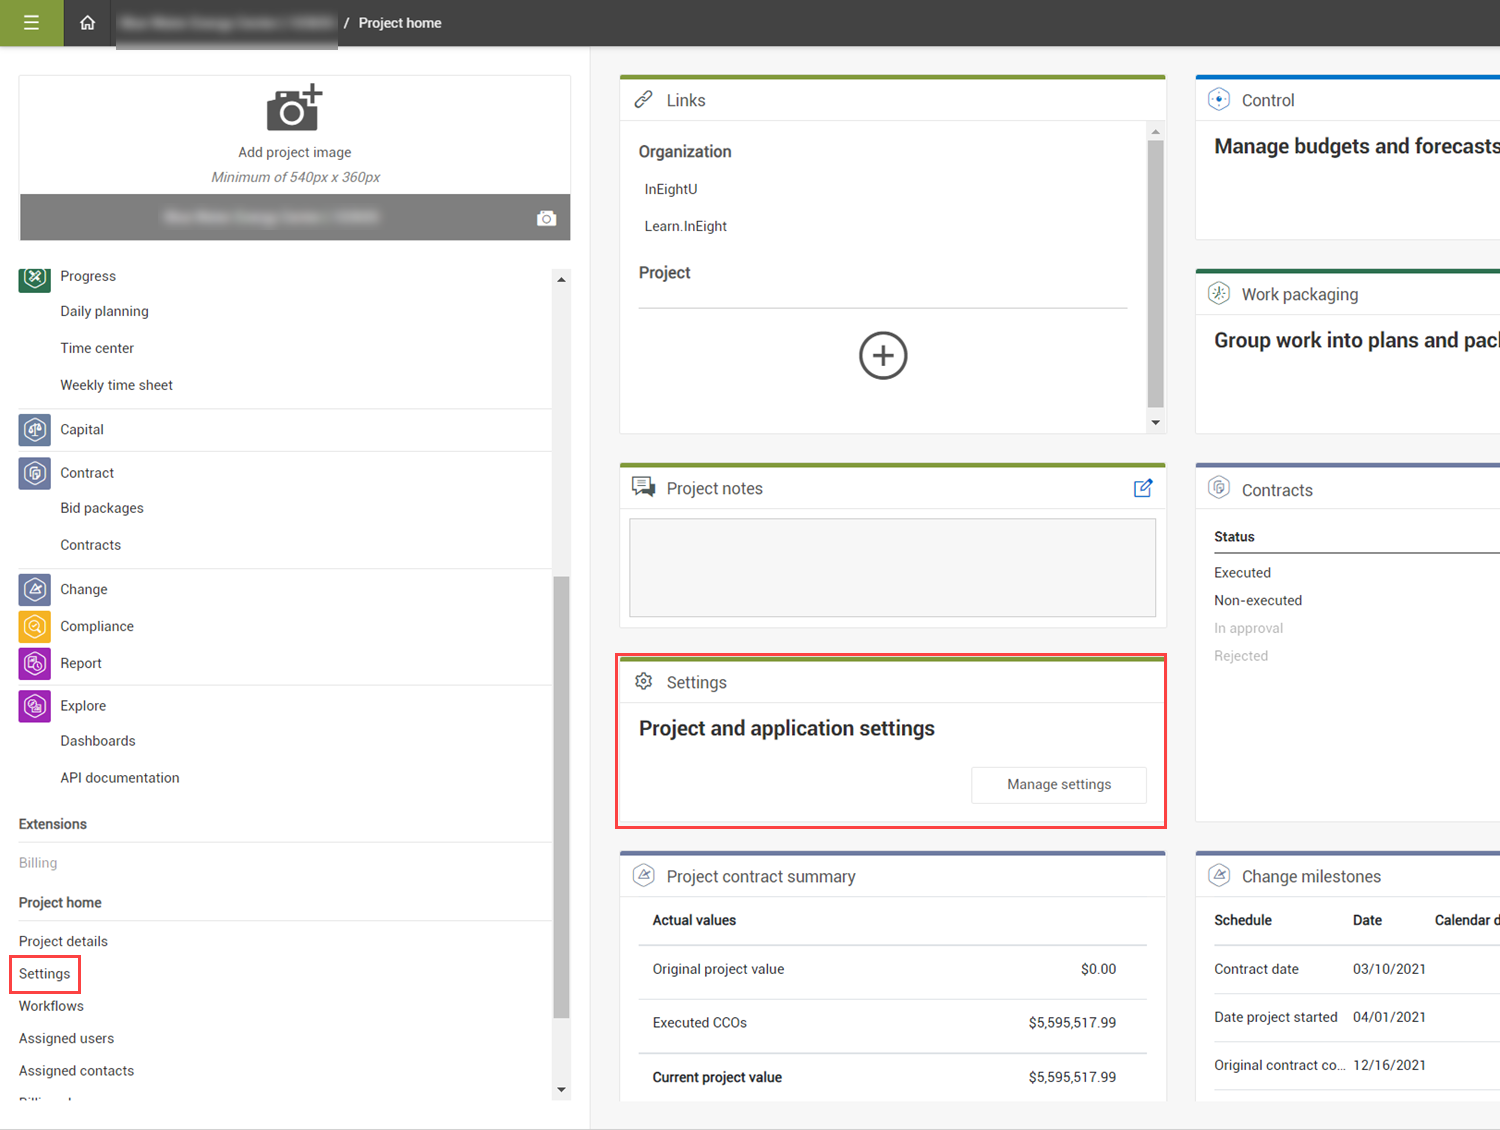
The image below shows you the two ways you can access Project settings from the Project home page.
Some settings defined at the organization level will limit the settings you can define at the project level.
The following steps walk you through how to navigate to project settings.
From the home page, click the Main menu icon on the upper-left side of the page.
Click the All projects & organizations menu option.
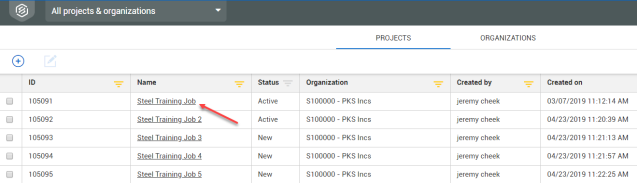
On the Projects tab of the All projects and organizations page, search for the Steel Training job.

After you find the project, click the project link in the Name column. The Project home page opens.
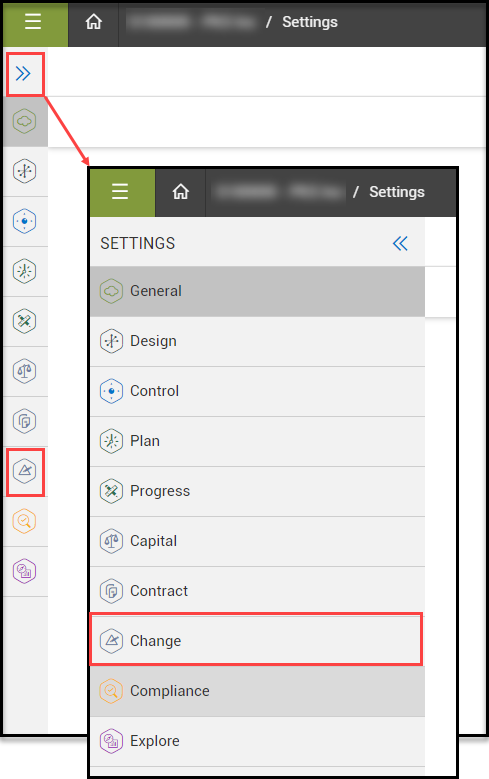
Click Settings from the Main menu. The Project settings page opens.
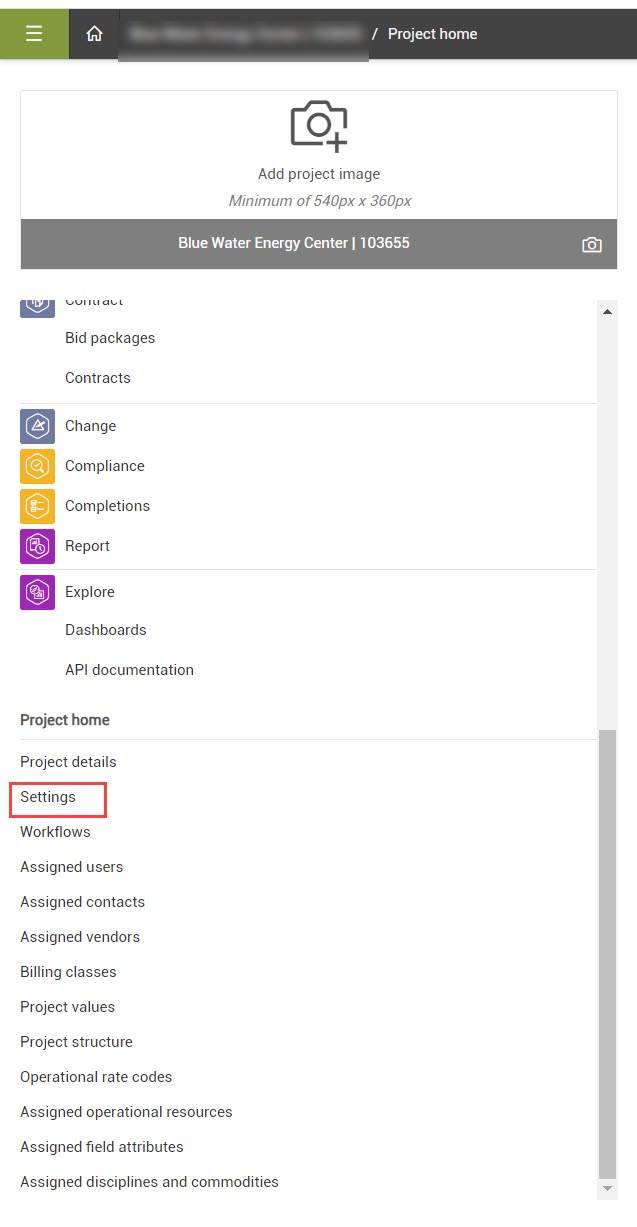
Click the Change icon in the left side navigation. You can use the expansion arrows to see the icons with product names.
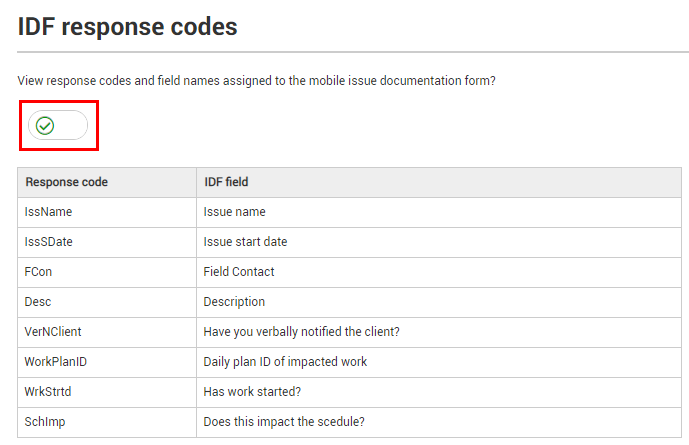
The Issue Documentation Form (IDF) section of Change allows you to view the IDF field name that is mapped to the response code by toggling the switch to on (green check).
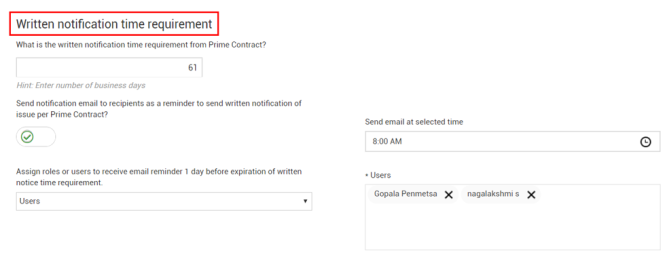
Under Notifications, select which notifications to turn on. Select the time of the email and use the drop-down list to assign users or roles.
The first section of the notifications sections allows you to control within how many days the project must notify the client of issues based on the prime contract. It also allows for the scheduling of email times and users/roles assignments.
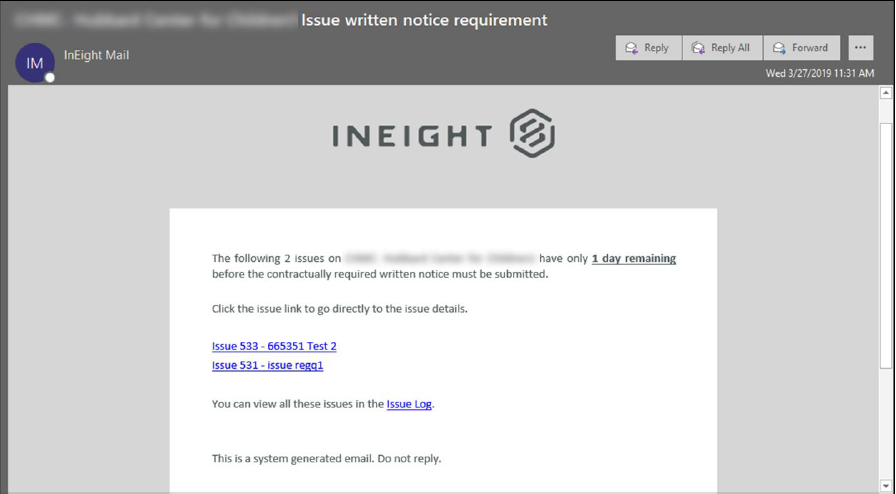
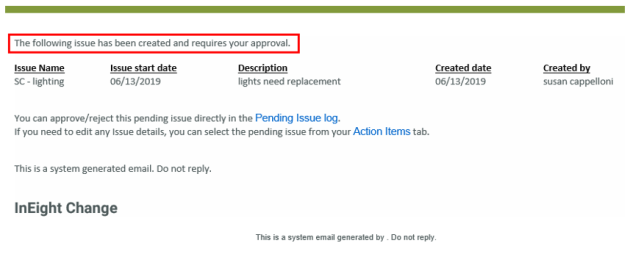
When written notification is set up, the user receives the following notification email, where the links direct to the specific issue details or the issue log.
This is an email notification that is sent to recipients based on schedule impact of an identified issue. The email notification includes new issues that have a Yes selected for scheduled impact within the Issue Detail page.

The user receives a summary notification of issues, PCOs, and CCOs assigned to them, where the links direct them to the specific issue details.

Example 1: Email with notification that an issue has been created and needs approval.
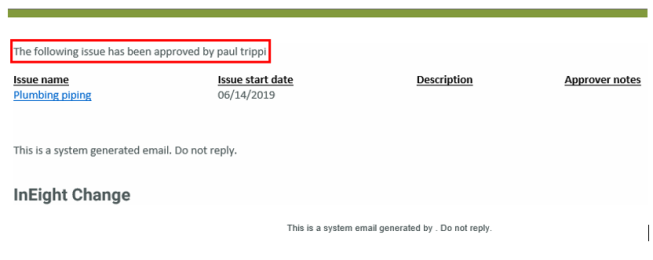
Example 2: Email with notification that an issue has been approved.
The Notify controller of adjustments settings let you notify a user when a contract adjustment or budget move has been sent to InEight Control.

Items are sent to Control when a client change order is executed. The email notification includes all adjustments that have been sent to Control.
One of the primary objectives of Workflow within Change is to provide users or roles with applicable access to approve issues, PCOs, or CCOs. Approvers will see different tabs on the Change register than a user with only viewer access.
Setting up a workflow for new issue approvals lets you specify approval steps and the users or roles responsible. The steps are performed for all new issue approvals in the project. The workflow cannot be edited in an individual new issue.
New issue approval workflows are configured on the project Settings > Workflow Assignments > New Issue approval setup page.
Add a new approval workflow to specify how a new issue gets approved.
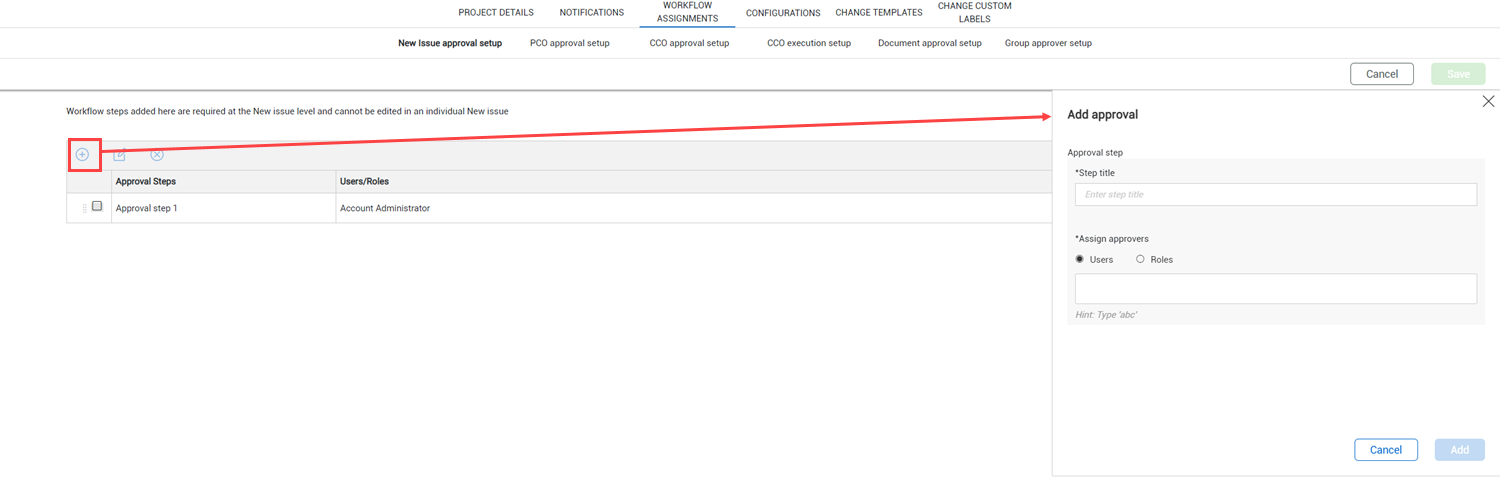
From the New approval setup page (Settings > Workflow Assignments > New Issue approval setup), click the Add approval icon. The Add approval slide-out panel opens.
Enter a title for the approval step.
Select whether the step is to be approved by a specific user or a user in a role, and then enter the name of the user or role. User names include email addresses to help you distinguish which user to enter.
Click Add. The step is added to the grid.
Repeat steps 1-4 for each approval step. You can use the up and down arrows to change the order of the steps.
Click Save.
When there is at least one step in the workflow, any new issues go into the New issue log with a status of In approval, and an email notification is sent to the approver.
The Workflow Assignments tab of your project settings is where you set up approval processes for approving PCOs and CCOs. The settings include defining the number of steps in approval processes and making assignments of who approves each step.
Change orders often have varying approvers, which can result in changing the project settings for each change order. Configuring approver group workflows provides alternatives in the approval process, which saves you from manually altering the workflow at the project level each time you require a change-specific workflow.
An approver group is a set of users or roles in steps, similar to an entire workflow. You can set up multiple groups in a single step in a workflow. For example, when a project is done in segments, you might have a different set of approvers for change orders in each segment. Instead of setting up a workflow that applies to the whole project, you can create a multistep group workflow for each segment. You can have one or more group steps in a workflow.
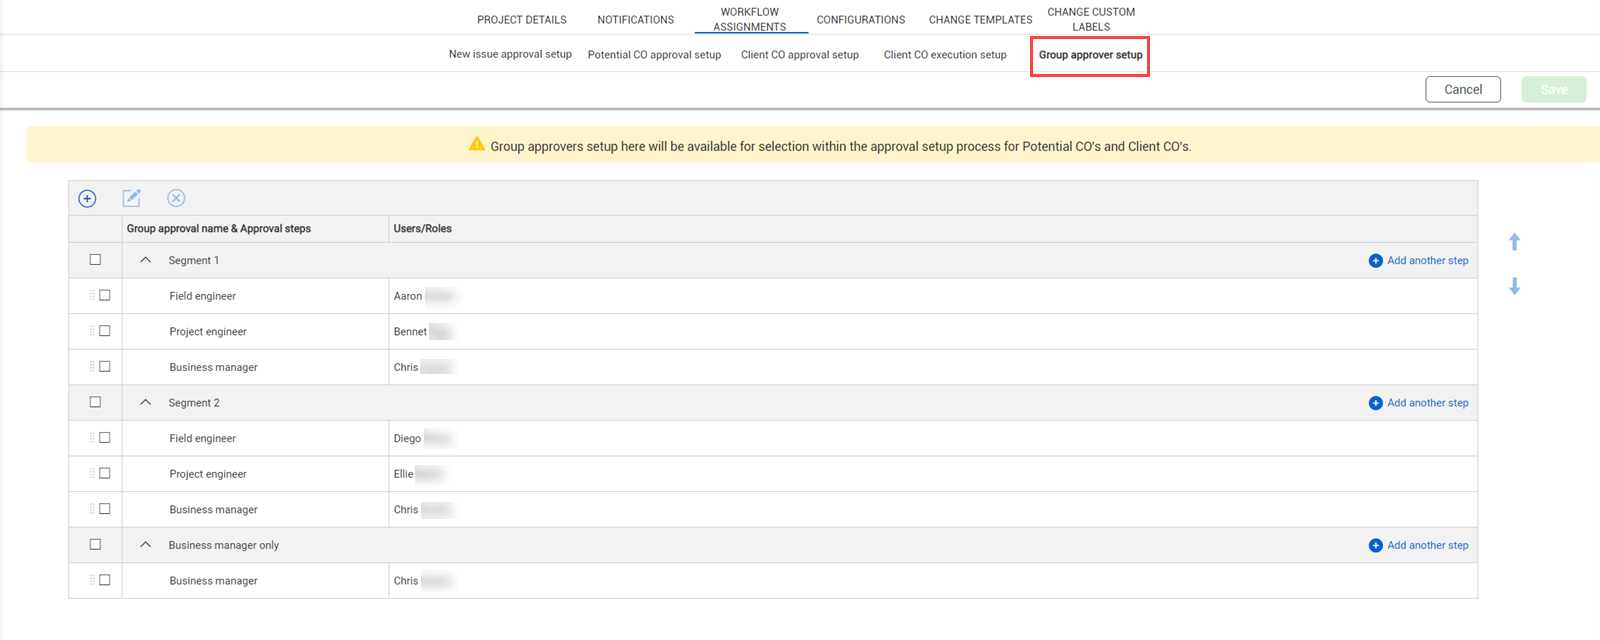
You can configure groups from the Group approver setup page (Project > Settings > Change> Workflow Assignments > Group approver setup). Each group can act as its own workflow. In the sample image, a project has two segments, each with a different field engineer and project engineer. The business manager is the same for both segments. A business manager only group is set up for a flow that only needs approval from the business manager, such as resubmitting a previously rejected payment form. All PCOs and CCOs in the project can use the groups.
When you start the approval process from the PCO or CCO, you can select the appropriate view when you click Save and Start approval.
Use group approval workflows as a single step in a larger workflow. The group workflow is users or roles arranged in steps, like the steps used in thresholds. Group workflows let you set up segment-specific workflows to use when a change order has multiple segments or when only one user or role must give an approval.
Only one step in an entire workflow can have a group step.
You can change the order of the steps by selecting the step and using the up and down arrows. You can use the group approval as a step when setting up PCO or CCO approval workflow.
You can set up dollar-value thresholds for PCOs or CCOs at the project level. The project has an approval matrix where any dollar amount over the threshold set must be approved.
In the project settings, go to Workflow assignments > PCO approval setup or CCO approval setup.

Add a workflow assignment threshold to set the amount at which a PCO or CCO must be approved.
The workflow steps set at the project level are performed after those set at the PCO/CCO. However, if the value of the PCO or CCO is below the project level thresholds, the workflow thresholds set at the project level will not show in the Workflow Assignments.
Go to the Workflow Assignments tab.
Select the PCO approval setup or CCO approval setup tab. If an organization step shows a red hazard icon, you must edit the step to select specific users based on assigned roles.
Click the Add approval icon.
In the Add approval slide-out panel, enter the threshold amount and approval step title.
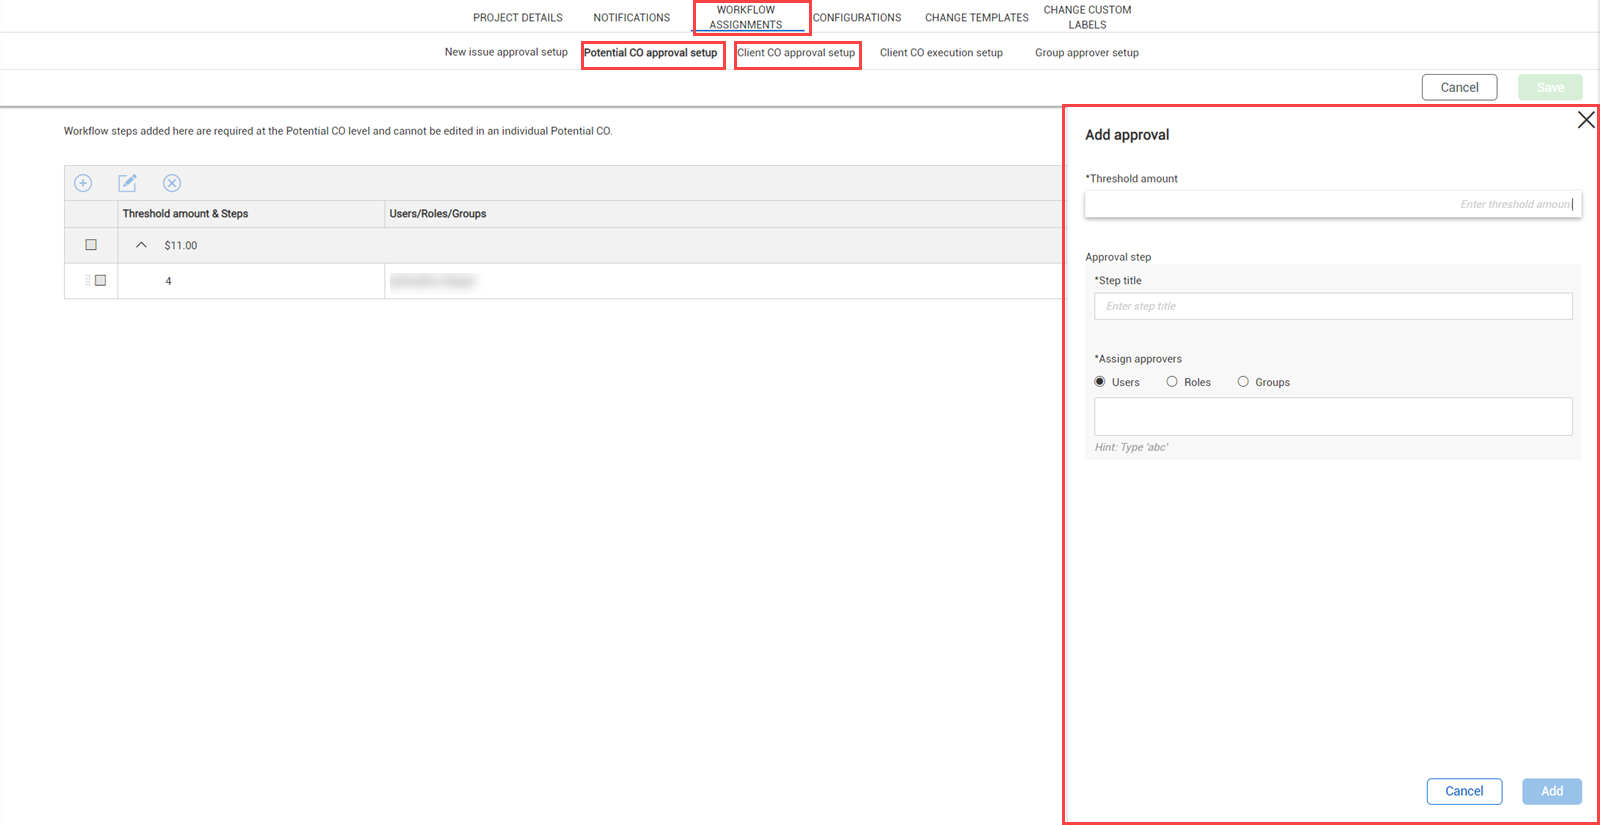
Enter the roles, users, or groups in the Assign approval roles field. You can also assign an approver as required by the organization level when you edit a threshold at the project level. When you edit a project-level threshold, the Edit approval slide-out panel includes a view of the organization-level steps at the same threshold. If the organization-level steps require editing, you can assign a user. All other fields of the organization steps are read-only. If the organization-level steps do not require editing, the entire step is read-only.
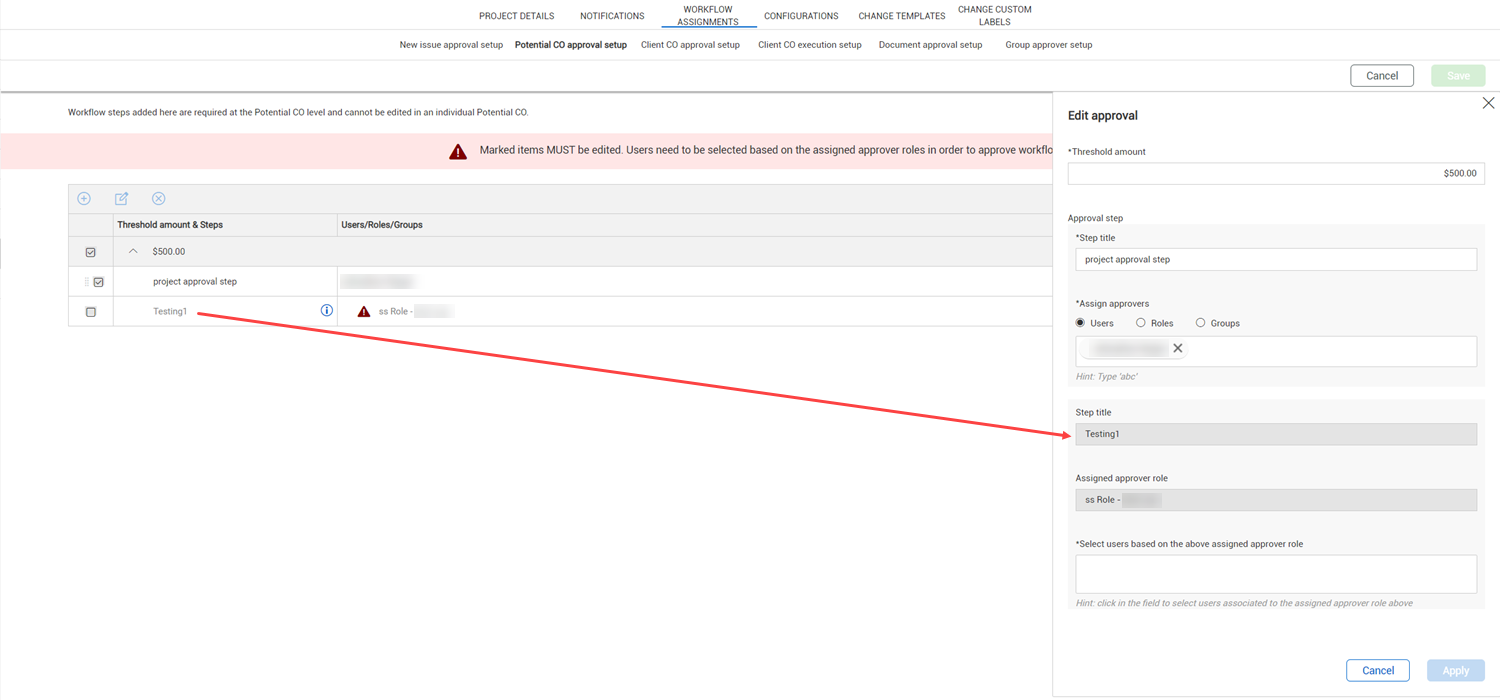
Organization steps that require editing are marked with a red triangle in the approval details. If there are no project-level steps, you can edit the organization-level steps individually.
Click Add to complete.
If you want the approval workflow for the threshold to have additional steps, click Add another step. To change the position of a step, select it, and then use the up and down arrows to the right of the steps to move up or down.
Users, roles, or groups can be assigned to steps at a project threshold.
Project-level thresholds cascade to every PCO or CCO. In a PCO or CCO, you can add additional approval steps. These steps are first, regardless of the value of the change order.
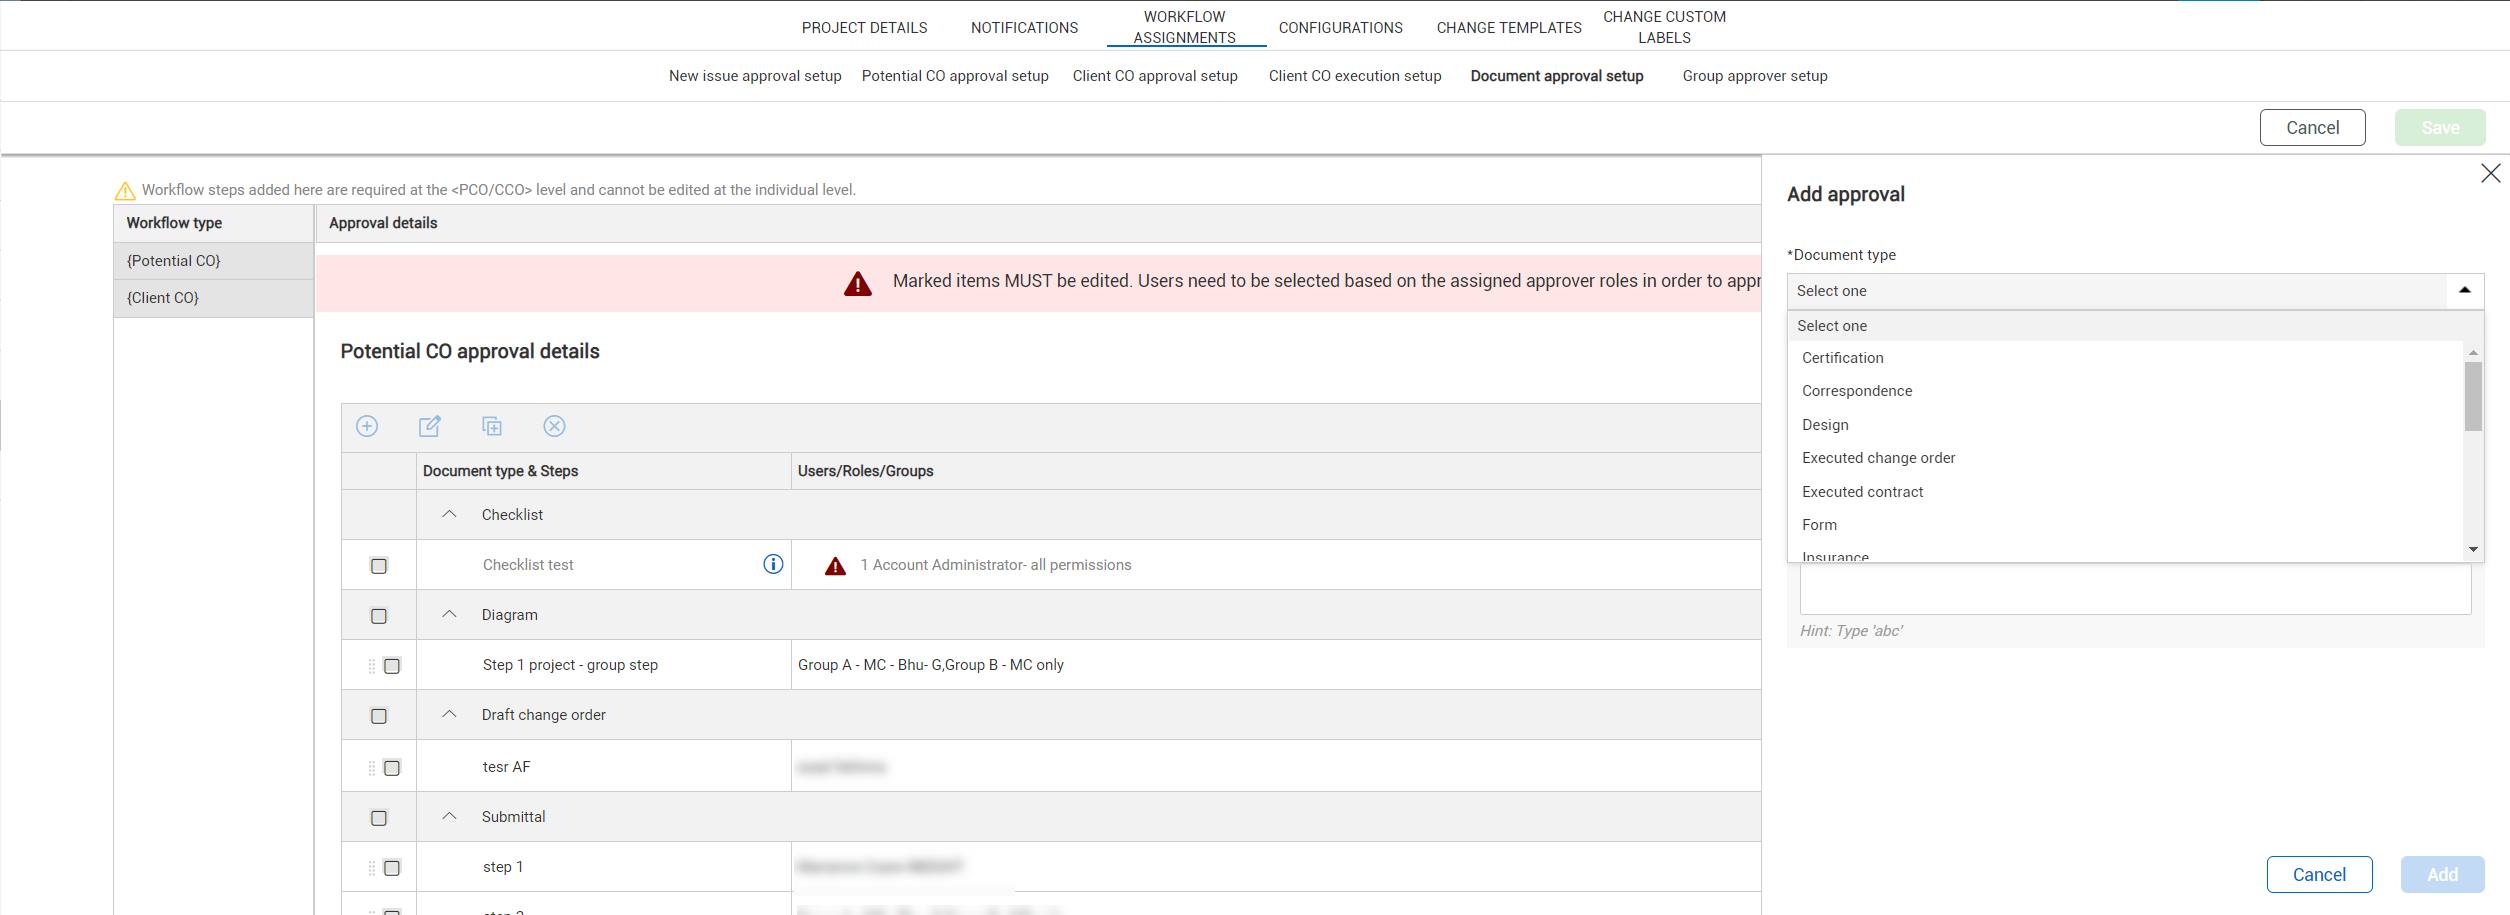
The Document approval setup lists document types for each document type instead of thresholds. For document approval, you select a document type, and then add approval steps.
| Item | Field | Definition |
|---|---|---|
|
1 |
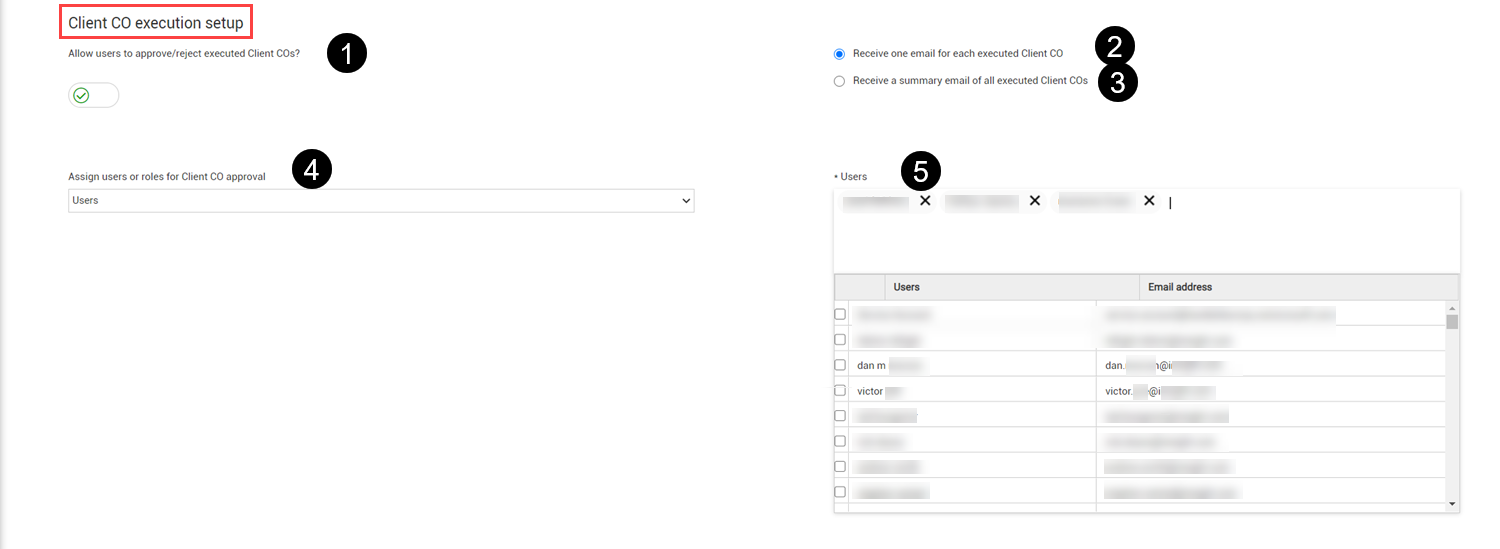
Allow users to approve/reject executed CCOs |
This setting is automatically defaulted to No. If it is set to Yes, users are allowed to approve/reject issues. If the option is set to On, you cannot switch to Off, if there is anything active in Workflow. If you would like to turn off Workflow, you would need to approve/reject/cancel all the pending Workflows, and then turn it Off. You can set up the Workflow to receive one email for each CCO, or receive a summary email of pending CCOs. If you select the second option, then you can select a specific time that the summary will be emailed. |
|
2 |
Receive on email for each CCO |
User or Role will receive an email for each individual issue. |
|
3 |
Receive a summary email of executed CCOs |
User or Role will receive a summary/grouping formatted email, instead of receiving individual issue emails. |
|
4 |
Assign user or roles for CCO approval |
When choosing the users option, you can select from a list of users to send out emails. If you choose the roles option, you can choose for a list of pre-defined roles. |
|
5 |
Users/Roles |
Based on what is chosen for “Assign users or roles for new issue approval”, you will need to choose from a list of users or roles. User names include email addresses to ensure that you select the correct user account. |
Additional Information
9977 N 90th Street, Suite 250 Scottsdale, AZ 85258 | 1-800-637-7496
© 2024 InEight, Inc. All Rights Reserved | Privacy Statement | Terms of Service | Cookie Policy | Do not sell/share my information